


How to Flush Grind a Flat, Smooth Surface with an Angle Grinder
How to Flush Grind a Flat, Smooth Surface with an Angle Grinder
If you've ever tried to grind down a weld or clean up a metal surface with a standard angle grinder setup, you know the problem: you end up with a bunch of arc marks dragged across the work. It looks rough, it's hard to fix, and it makes the rest of your finish work harder. The issue isn't the grinder — it's the setup. Here's how to fix it with the HDII Flange Wheel and walk away with a surface that's actually smooth.
Why Your Angle Grinder Leaves Grind Marks
With a standard angle grinder setup, the wheel sits inside the guard. That means when you press it down onto a flat surface, you're making contact with the edge of the wheel — not the face. That edge digs in at an angle and drags across the material, leaving those characteristic arc-shaped grind marks.
You can try to work around it. But you can't grind flat with an edge. The geometry is wrong from the start.
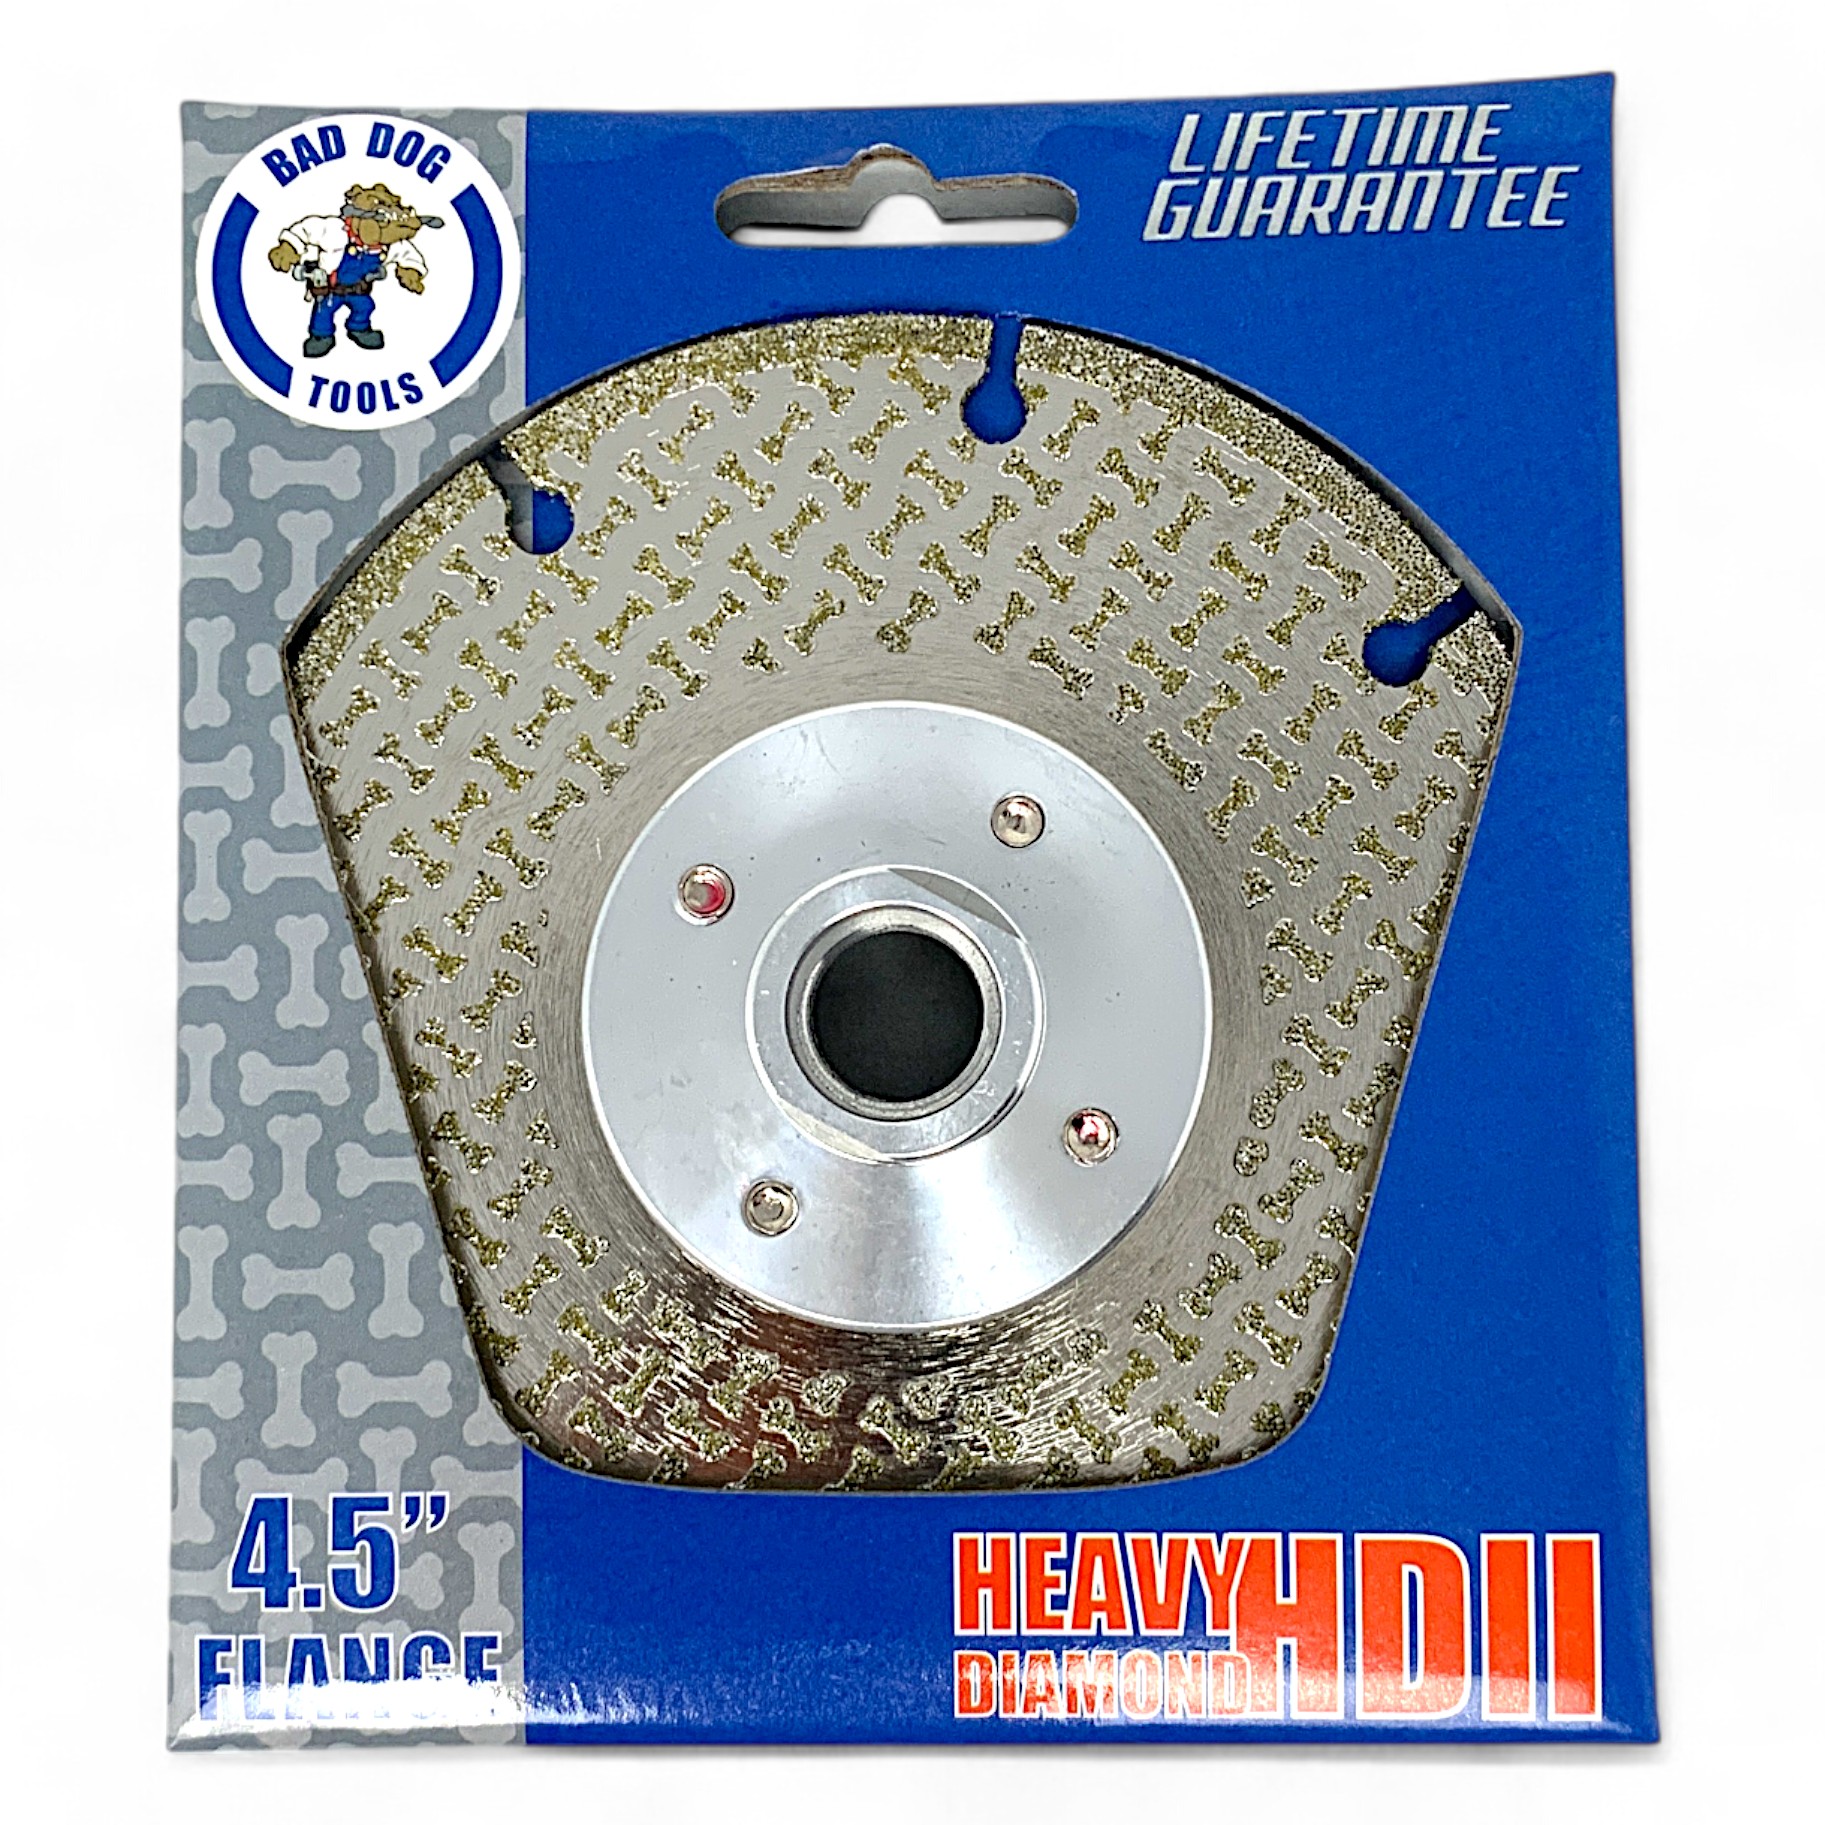
What the HDII Flange Wheel Does Differently
The 5" HDII Flange Wheel is a two-piece system: the HDII diamond wheel and a machined steel flange that the wheel mounts to. When you bolt the flange assembly onto your angle grinder, the wheel ends up outside the guard instead of inside it.
That one change makes all the difference. Now the flat face of the wheel — coated in 46-grit industrial diamond on both the face and edge — is what contacts the material. You're grinding flat. You're grinding flush. And you're not leaving marks.
The HDII's steel core also means no exploding abrasives, no fiberglass debris, and no worrying about whether the wheel is going to hold up. It's virtually unbreakable, and it's backed by a lifetime guarantee from Bad Dog Tools — a family-owned company that's been making grinding tools in Bristol, RI since 1988.
How to Set Up the HDII Flange Wheel
What you'll need: HDII Flange Wheel, Loctite, screws (included), angle grinder with 5/8-11 arbor
- Lay the flange flat. You'll see eight countersunk holes machined into it. These holes are countersunk on both sides so you can flip the wheel and use both faces.
- Set the HDII wheel onto the flange. Line up the holes.
- Apply Loctite to the screws. This keeps everything locked in under vibration.
- Thread the screws in and tighten down. The wheel is now mounted to the flange.
- Remove the standard wheel setup from your grinder. Unbolt with the included wrench.
- Thread the flange assembly onto the 5/8-11 arbor. Tighten it down.
- Grind. The wheel is now outside the guard. Lay it flat on the surface and you're flush grinding.
WANT TO RUN WITHOUT THE FLANGE?
Pull the four mounting screws, remove the flange, and bolt the wheel back on directly. It's the same wheel — just a different setup for different jobs. Swap the flange back on whenever you need to.
Quick Reference
| Spec | Detail |
|---|---|
| Wheel diameter | 5 inches |
| Grit | 46-grit industrial diamond |
| Diamond coverage | Face and edge |
| Arbor size | 5/8-11 (standard angle grinder) |
| Core | Steel — no fiberglass, no abrasive shards |
| Works on | Metal, masonry, tile, concrete, stone |
| Not for | Wood, glass |
| Guarantee | Lifetime — Bad Dog repairs or replaces |
Flange vs. No Flange: See the Difference
It's not subtle. Run a pass without the flange and you'll see the arc marks immediately — the wheel edge dragging across and scoring the surface. Put the flange on, run the same pass, and the surface comes out smooth. Those marks grind right out.
This is the whole point of the HDII Flange setup. It's not just a wheel — it's a positioning system that changes how the diamond contacts the material. Flat face to flat surface. That's flush grinding.
STOP FIGHTING YOUR SETUP.
The 5" HDII Flange Wheel gives you a flat, smooth grind every time — on metal, masonry, tile, concrete, and stone. Built on a steel core, made in the USA, and backed by a lifetime guarantee. If it breaks, Bad Dog replaces it.
SHOP THE 5" HDII FLANGE WHEEL →Questions? Call us at 800-252-1330 or browse the full HDII lineup.
Frequently Asked Questions
Why does my angle grinder leave marks when I grind?
With a standard setup, the wheel sits inside the guard and contacts the surface at an angle — meaning you're grinding with the wheel's edge, not its face. That edge drags and scores the surface, leaving arc-shaped marks. To grind flat and mark-free, you need the wheel face making full contact with the material.
What is flush grinding?
Flush grinding means the face of the wheel is flat against the work surface, making even contact across the whole cutting area. It produces a smooth, uniform finish instead of the marks you get from edge contact. The HDII Flange Wheel is designed specifically to enable flush grinding on a standard angle grinder.
Can I use the HDII Flange Wheel without the flange?
Yes. The flange is modular — remove it with four screws and the HDII mounts directly to your grinder. You lose the flush grinding position, but it's the same diamond wheel for cutting and edge work. Swap the flange back on anytime.
What materials can the HDII Flange Wheel cut and grind?
Metal, masonry, tile, concrete, and stone. The 46-grit diamond face and edge handles multi-material work without switching wheels. It's not recommended for wood (causes burning) or glass (produces jagged edges).
Does the HDII Flange Wheel fit my angle grinder?
The 5" HDII Flange Wheel uses a standard 5/8-11 threaded arbor, which fits most angle grinders. If you're unsure, check your grinder's arbor spec — it's usually listed in the manual or on the tool itself to confirm.
Written by Joseph Strong on 8th Apr 2026 I’m JJ Strong, a mechanical engineer and third-generation tool designer at Bad Dog Tools, our American-made, family-run company built on durability and innovation. I grew up hauling booths and talking tools at trade shows before I could even drive. Now I design and build and improve our next generation of lifetime-guaranteed tools - our custom induction brazing system to our precision sharpening technology. On weekends, you’ll find me restoring my ’86 Land Rover Defender or ’54 Jaguar XK120 and seeing just how much I can build (or break) with Bad Dog Tools.